We made this card at April's Stamp Camp. The nice thing about having the Petite Pairs set available is that everyone can customize their cards using the sentiments that they need.
Stamps: En Francais, Best of 25 Years Flowers, Petite Pairs
Inks: Pool Party and Island Indigo
Paper: Pool Party, Island Indigo, Whisper White
Accessories: 1 3/8 inch square punch, Simply Scored
Thursday, April 25, 2013

Wednesday, April 24, 2013
Retiring List is now posted, hurry while supplies last!

To see what stamps are retiring, click here.
To see what accessories are retiring, click here.
When checking out, use this hostess code, UENYMMZE ,to be entered into a special drawing!
Friday, April 19, 2013
Summer Silhouettes Masked


Inks: Wild Wasabi, Perfect Plum, So Saffron
Paper: Whisper White
Other: Simply Scored, Sponge Daubers
Mickey Mouse Punch Art


Using a piece of 3 1/4 x 3 3/8 inch Basic Black held vertically, I lined up the 1 3/4 inch circle as far in as it could go and punched. Then, I used the 1 inch punch for the ears, only getting a little bit of the larger circle. The bow is created using 2 of the smallest heart from the Triple Heart Punch and 1 of the medium circles from the Owl Punch. Glue dots hold the bow together and adhere it to the card.
Use dimensionals on the back of the Mickey and attach it to a 3 1/2 x 3 5/8 piece of Real Red.
Stamp the "Thanks," or other desired sentiment on the card base, then adhere the Mickey.
Use the circles that were previously punched and make a Mickey shape inside the card.
Stamps: Outlined Occasions (retired)
Ink: Basic Black
Paper: Pacific Point, Real Red, Basic Black
Other: Dimensionals, Glue Dots, 1 inch circle punch, 1 3/4 inch circle punch, Owl Punch, Triple Heart Punch (retired)
Thank you to Dawn Olshefski for the inspiration for this card!
Thursday, April 18, 2013
Postage Punch and Floral District Birthday


Inks: Lucky Limeade, Rich Razzleberry
Paper: Whisper White, Floral District DSP
Other: Postage Stamp Punch, Oval Punch, Lucky Limeade 3/8 inch Ruffled Ribbon
Wednesday, April 17, 2013
New Photopolymer Stamp Set


New Cases for Wood Mount Stamps!
Stampin' Up! is rolling out new wood-mount stamp set packaging! These new cases are similar to the clear-mount boxes and fit perfectly on the shelf right next to them. They also have the images and stamp set name on the spine to make your search for the right set even easier.
Starting May 31, all wood-mount sets will come in this new packaging. The empty cases will also be available with the launch of the new catalog, which means you can transfer all your old sets to these new boxes!
There will even be a template for you to create your own label for your old stamp sets (available May 31). A pack of four half-size cases (3-3/4" x 5-1/2") will sell for $4.95 and a pack of four full-size cases (7-1/2" x 5-1/2") will be $6.95.
Get ready for all the exciting new products in the catalog--especially the new wood-mount boxes!
Thursday, April 11, 2013
Windows Frames and Summer Silhouettes

Stamps: Summer Silhouettes, Outlined Occasions (retired)
Ink: Raspberry Ripple, Green Gumball
Paper: Raspberry Ripple, Whisper White, Polka Dot Parade DSP
Other: Window Frames Framelits, Polka Dot Embossing Folder, Jewels, Raspberry Ripple 3/8 inch Stitched Satin Ribbon
Wednesday, April 10, 2013
Butterfly Punch in Frame


Tuesday, April 9, 2013
Everybunny Easter


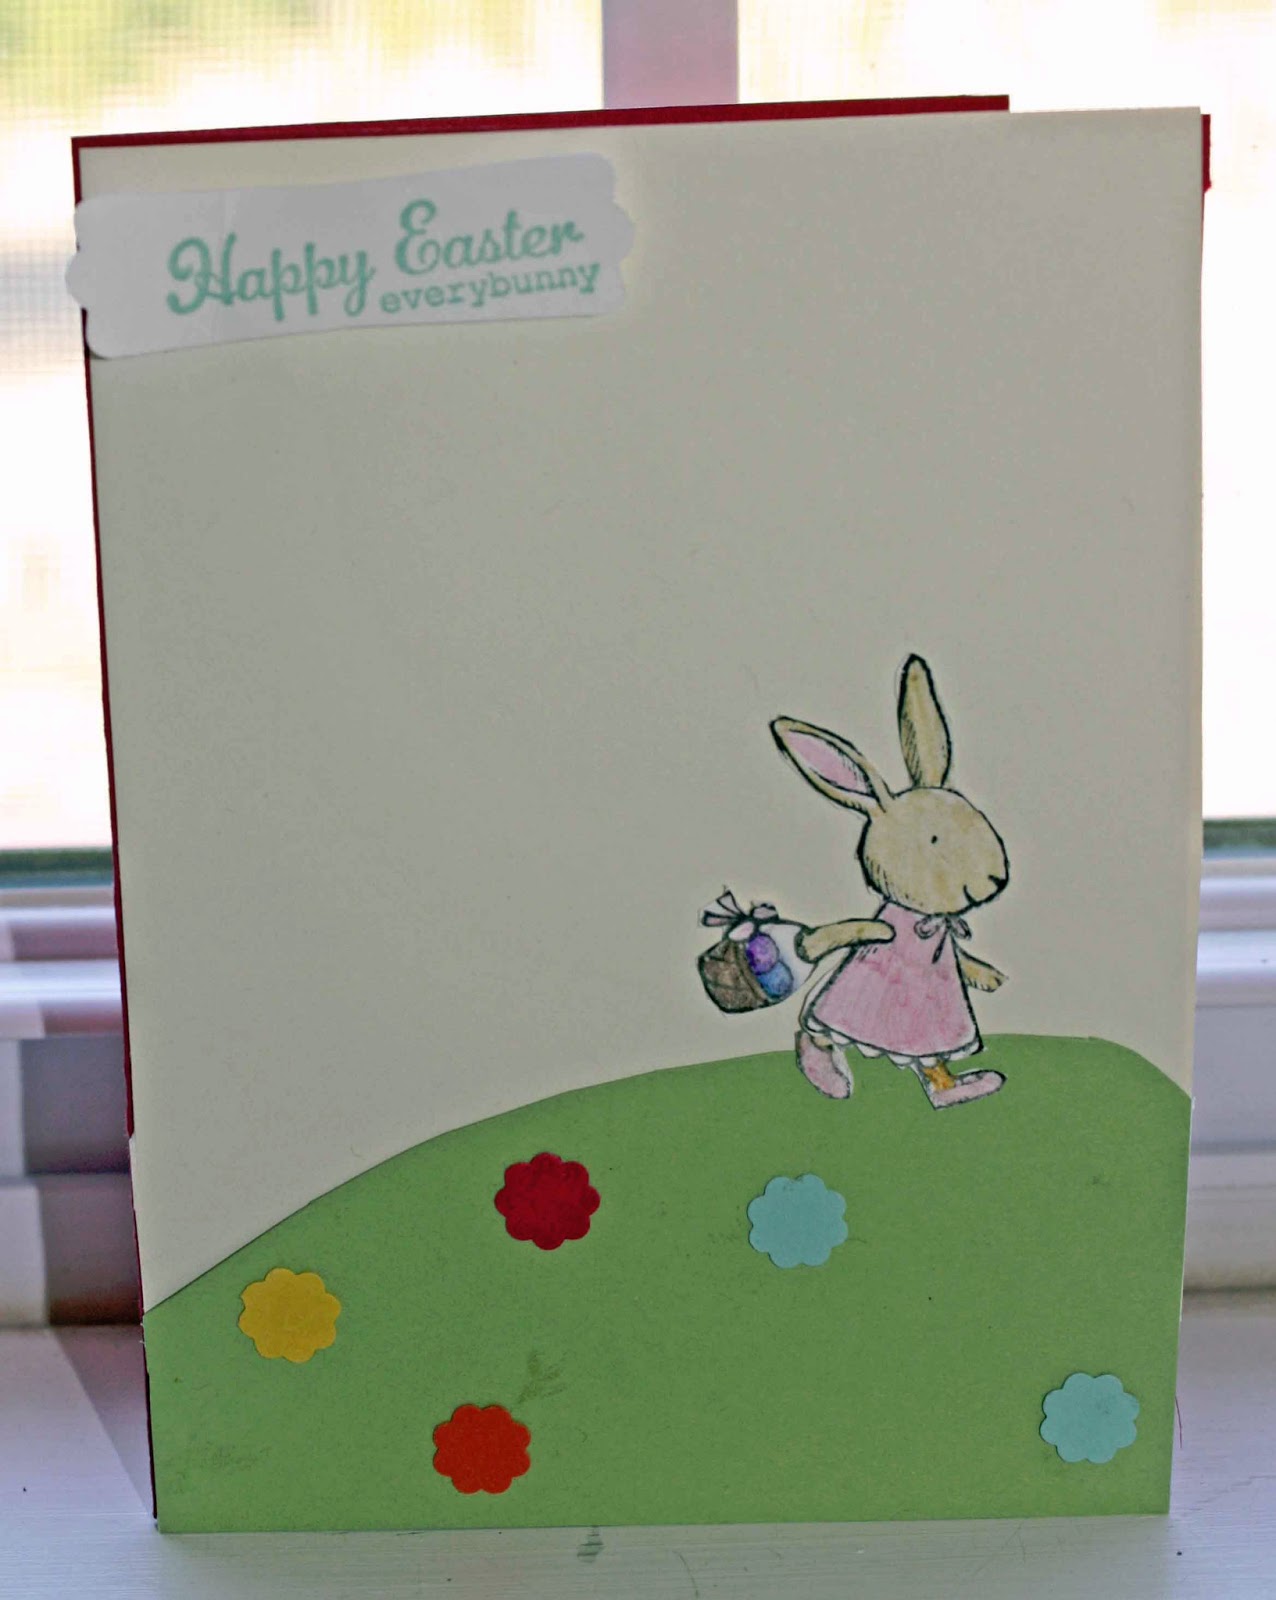
Stamps: Everybunny
Ink: Pool Party, Stazon black, Blender Pen and various ink pads for coloring rabbit
Paper: Wisteria Wonder, Whisper White, Lucky Limeade (I believe she used Certainly Celery and Very Vanilla)
Other: Itty Bitty Punch Pack, Pearls, Scallop Border Punch, Modern Label Punch, Cloudy Day Embossing Folder
Monday, April 8, 2013
Summer Silhouette Birthday, Last day of FREE SHIPPING


I also stamped off for the stem to make it lighter (meaning I inked up my stamp, stamped it on scrap paper, then stamped it on my card stock for the card).
I was shooting for a masculine birthday, but I'm not sure if it's "manly" or just more of an autumn card.
Stamps: Summer Silhouette, Blooming with Kindness
Ink: Soft Suede, Pool Party
Paper: Whisper White, More Mustard, Retired DSP Spice Cake
Other: Simply Scored Board, Seam Binding in Pool Party, Houndstooth Embossing folder, Scallop Edge Border Punch, dimensionals
Thanks to SU! demonstrator Catherine Pooler for the inspiration for this card.
Today is the last day to take advantage of FREE SHIPPING! Have you placed your order yet? Click here to start shopping!

Sunday, April 7, 2013
Summer Silhouettes for Mother's Day, Birthday, Just Because!


Stamps: Summer Silhouettes, Teeny Tiny Wishes
Ink: Rich Razzleberry, Lucky Limeade, Pacific Point, Daffodil Delight
Paper: Rich Razzleberry, Pacific Point, Daffodil Delight, Lucky Limeade, Whisper White, International Bazaar DSP
Other: Circles #2 Die for Big Shot, Delicate Designs Embossing Folder, Large Scallop Edgelit, Lucky Limeade 3/8 inch Ruffled Ribbon or Daffodil Delight 1/4 inch Stitched Grosgrain Ribbon, Word Window punch, Modern Label Punch
Saturday, April 6, 2013
Thank you with butterfly and FREE SHIPPING starts today!


These cards turned out so pretty, and I just love the details that were so easy to add! The little butterfly is stamped and punched and adhered to the larger butterfly, the little flowers have tiny jewels on them, and the layering of the circles in the middle adds just the right amount of shadowing.
Stamps: Papillon Potpourri, Lacy and Lovely
Ink: Pool Party, Island Indigo
Paper: Whisper White, Pool Party, Island Indigo. Sycamore Street DSP
Other: Jewels; Itty Bitty, Bitty Butterfly, Elegant Butterfly, 1 1/4 and 1 3/4 inch circle punches
FREE SHIPPING starts today!!! Click here to shop now. What is on your order?
Friday, April 5, 2013
Summer Silhouettes in Wisteria Wonder


Stamps: Summer Silhouettes, Made for You
Ink: Wisteria Wonder, Lucky Limeade
Paper: Whisper White, Wisteria Wonder
Other: Vintage Wallpaper Embossing Folder, Lucky Limeade 3/8 inch Ruffled Ribbon
FREE SHIPPING!!!
We're excited to let you know that we are offering FREE shipping on EVERYTHING April 6-8! That's right. There are no minimums or limits and all order types, except expedited, qualify (customer, demonstrator, workshop, online). Did we mention that the free shipping is on everything?


Been considering trying the new photopolymer stamps?

Want to order the Watercolor Crayons or the retiring colors before they are gone?
Can't wait to try out the Best of
Butterflies set?
 Need some cardstock or just want some new stamps, like the sneak peak from the 2013-2014 catalog, A Round Array?
 Now is the perfect time to order and save with free shipping!

Get busy shopping--
Thursday, April 4, 2013
Best of Butterflies is Best of April Stamp Set

Do you recognize some of the other butterfly stamps? The butterfly on the middle left is from a stamp set called Strength and Hope; sales from this stamp set helped raise money for the Breast Cancer Research Foundation. Pictured below is a card I made with that stamp set. Click here to see other samples.


Watercolor Pencils and Crayons Discontinued
Due to unforeseen problems with our supplier for Watercolor Wonder
Crayons and Watercolor Pencils, Stampin' Up! has decided to discontinue these two
products.
Watercolor Pencils and Watercolor Wonder Crayons Brights Collection , which have been on the Backorder Report for about a week, will no longer be available, effective immediately.
Now for the good news! We still have the remaining collections of the Watercolor Wonder Crayons available to order. The Subtles (item 119802), Neutrals (item 119805), and Regals (item 119803) Collections are only available while supplies last. Get 'em before they're gone!
Subtles (item 119802)

Neutrals (item 119805)

Regals (item 119803)

Watercolor Pencils and Watercolor Wonder Crayons Brights Collection , which have been on the Backorder Report for about a week, will no longer be available, effective immediately.
Now for the good news! We still have the remaining collections of the Watercolor Wonder Crayons available to order. The Subtles (item 119802), Neutrals (item 119805), and Regals (item 119803) Collections are only available while supplies last. Get 'em before they're gone!
Subtles (item 119802)
Neutrals (item 119805)
Regals (item 119803)
COLOR REFRESH, other updates!
The 2013-2014 catalog is on the way; April 24th we will have a sneak
peak and will have the "Retired List" of products from the 2012-2013 catalog. Ordering from the
new catalog will begin May 31, 2013! Read on for information about color changes; I'm so glad we will not have to say goodbye to Wisteria Wonder or Pool Party!!


Click here to watch a video introducing the color refresh.
Tuesday, April 2, 2013
Putting your stamps together--Clear Mount Assembly
I have tried many different methods of putting labels on clear mount stamps. I was surprised when I stumbled upon a new technique by SU! demonstrator Maureen McGrail, and I actually think it works the best!
1. Start with a new stamp set. Turn the entire piece containing the stamps over to the back and peel off all of the white backing paper.

 2. When finished, make sure the stamps are as flat as you can make them. If you have pulled them out any when taking off the paper, gently push them forward again to make the back flat.

3. Now find the label you want to start with. Peel the entire sticker, including the paper backing, off of the label sheet.

4. Find the slit in the paper on the label. Peel off one side ONLY.

5. Using the half of the label with the paper still attached, line up the label to the back of the corresponding stamp.

6. Once in place, gently let the sticky side adhere to the stamp. Lightly rub to ensure it is in place.

7. Now remove the other part of the paper and just let the sticker gently roll into place, lightly rubbing to completely adhere.

 8. Now your label will be correctly positioned and your stamp will be flat!
 9. Repeat the process with all of the stamps and labels, then you can detatch the stamps from the rest of the rubber. Now it is time to start stamping!
1. Start with a new stamp set. Turn the entire piece containing the stamps over to the back and peel off all of the white backing paper.


3. Now find the label you want to start with. Peel the entire sticker, including the paper backing, off of the label sheet.

4. Find the slit in the paper on the label. Peel off one side ONLY.

5. Using the half of the label with the paper still attached, line up the label to the back of the corresponding stamp.

6. Once in place, gently let the sticky side adhere to the stamp. Lightly rub to ensure it is in place.

7. Now remove the other part of the paper and just let the sticker gently roll into place, lightly rubbing to completely adhere.


Subscribe to:
Posts (Atom)